The “multimask” is a concept in OldInsuranceMaps.net that greatly eases the creation of seamless mosaics from many different georeferenced layers. I recently made some updates to the user interface for this tool, and decided to take the time to provide a better introduction to feature as a whole.
Make me a clean mosaic
To understand how the multimask idea came about, consider that if you georeference all pages in a historical atlas, you’ll get something like this:
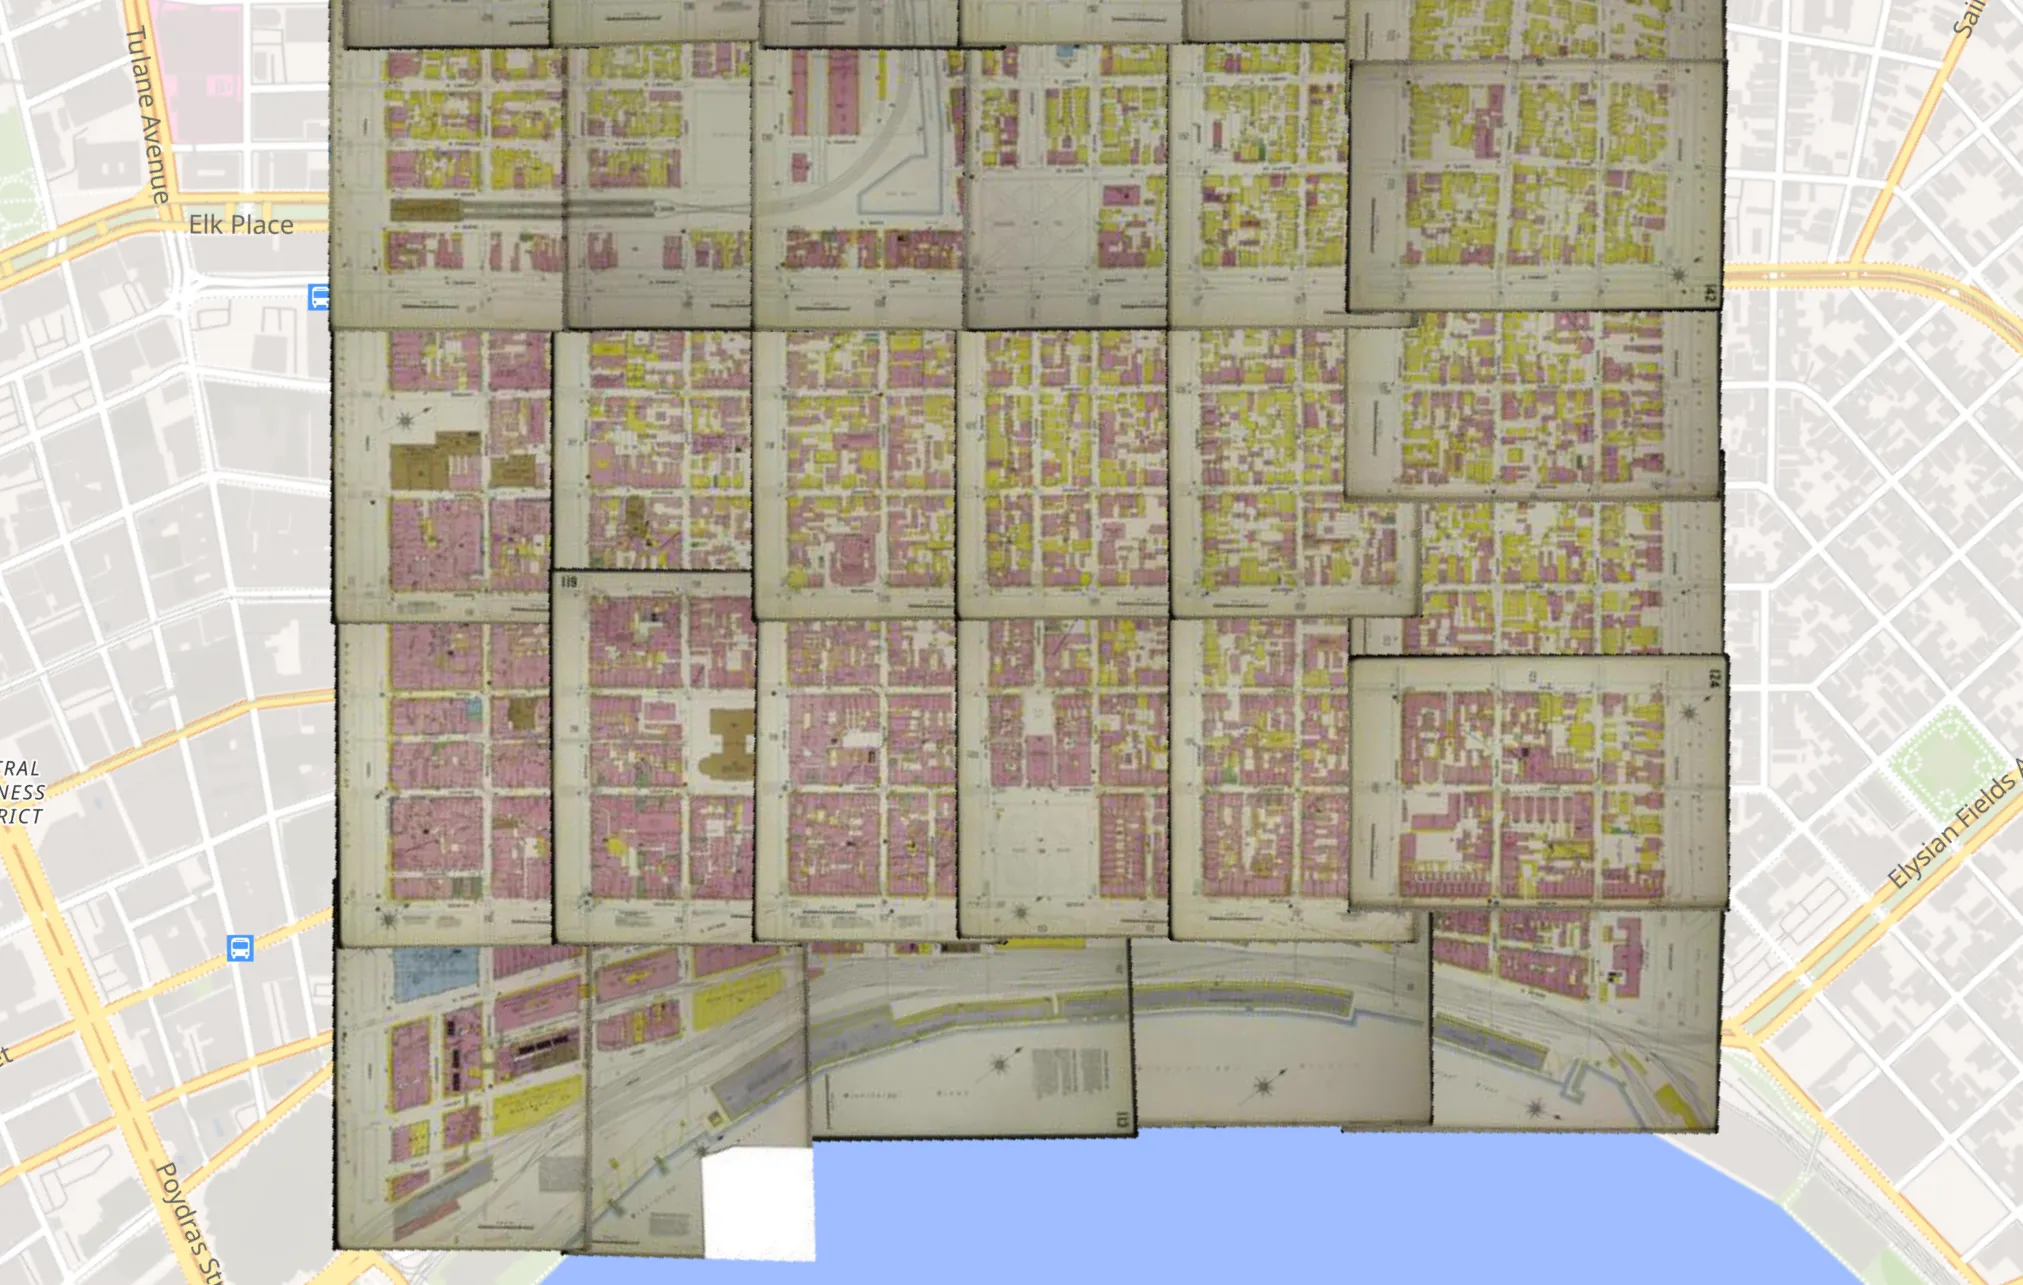
This is the historic French Quarter in New Orleans, as shown on 24 georeferenced pages from the Sanborn map, Vol. 2, 1908. As you can see, while each individual layer would look fine on its own, when they are all displayed together in a single web map the margins from each sheet overlap each other. This obscures information on adjacent sheets, and, generally speaking, looks very messy.
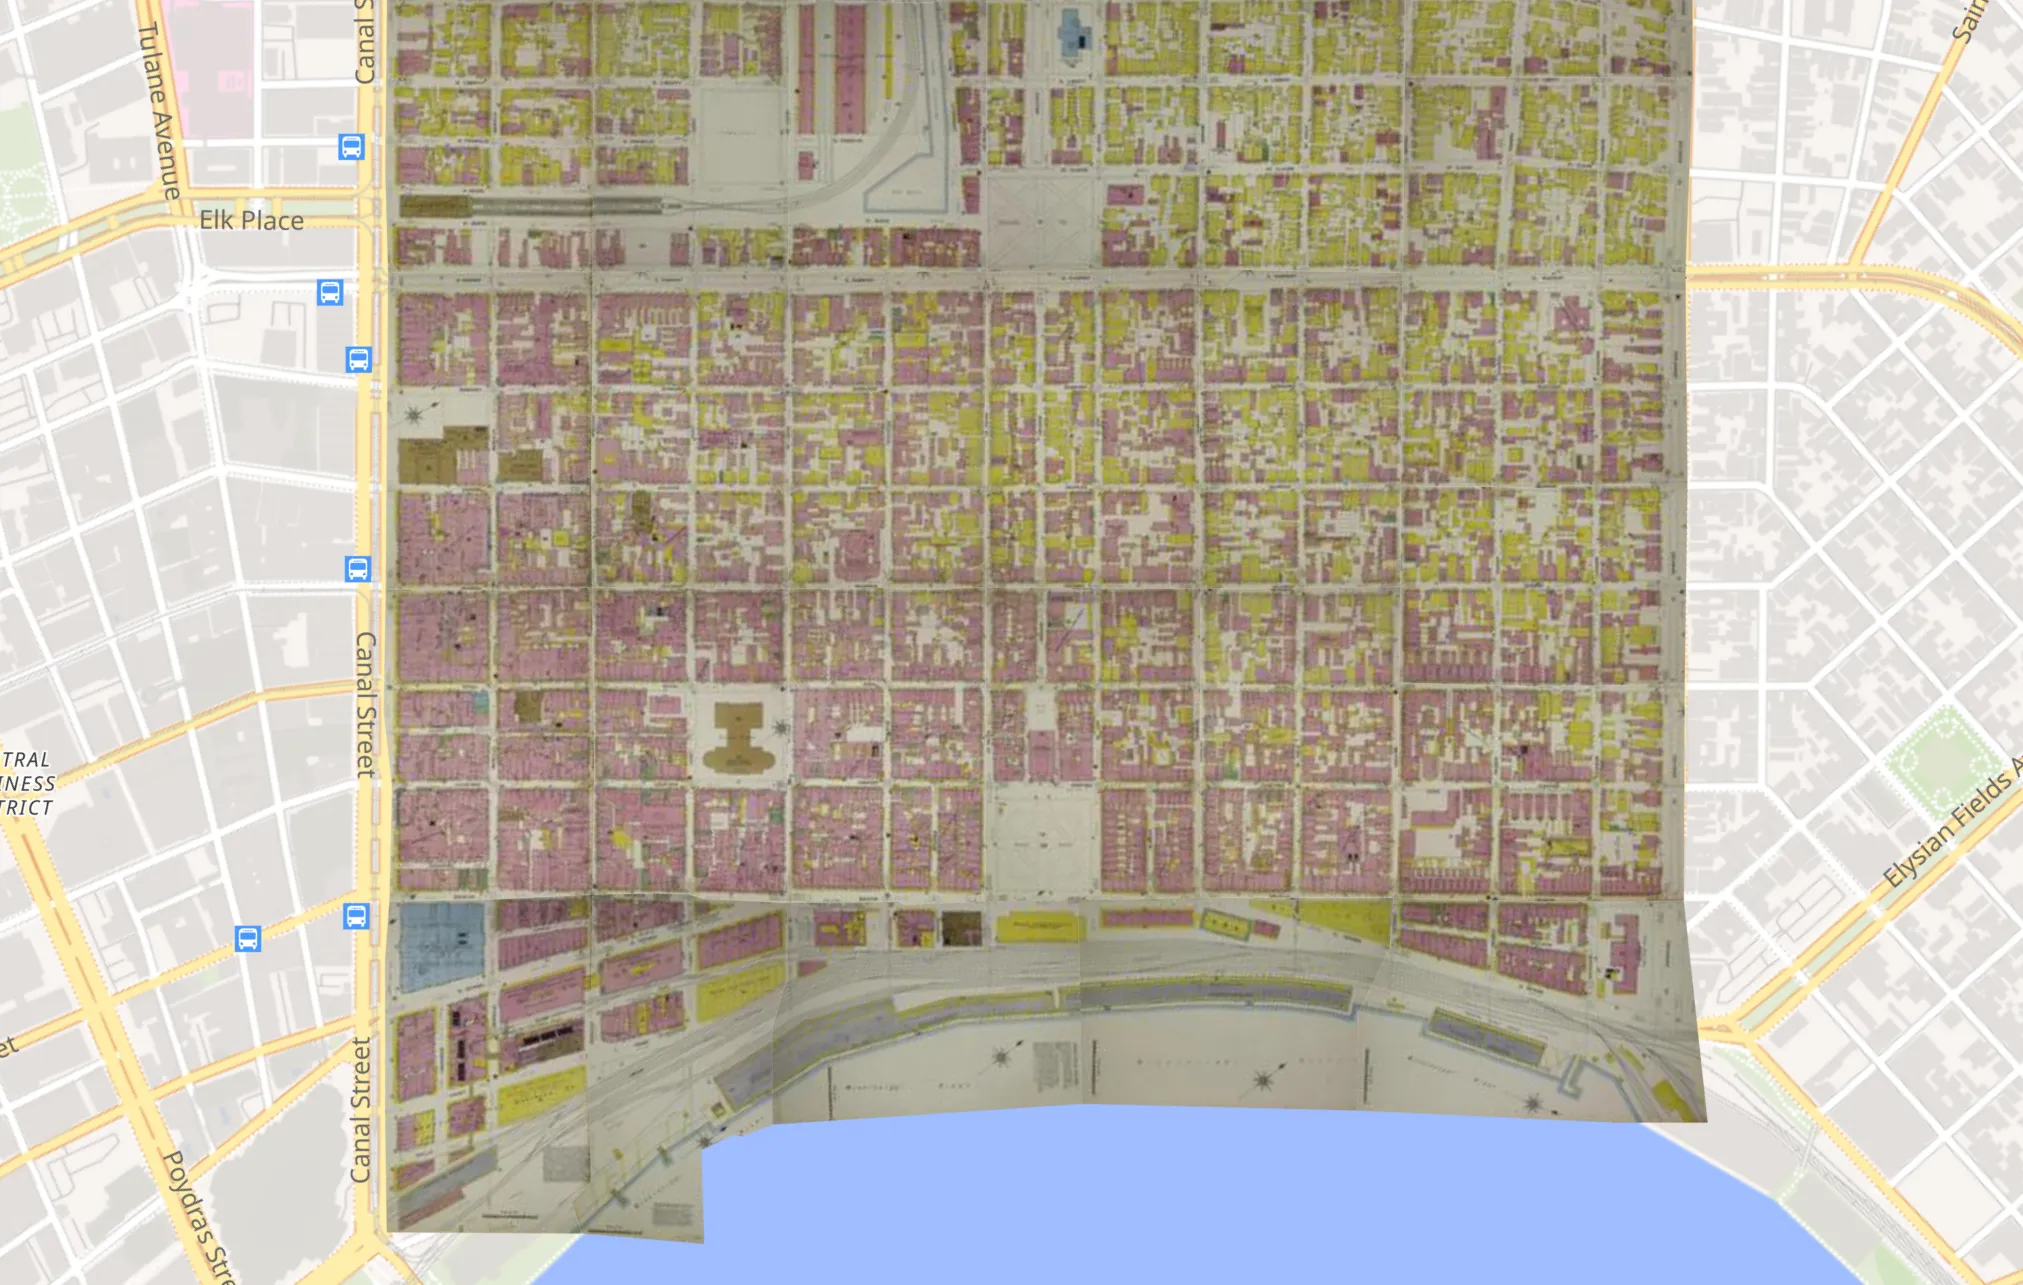
Instead, we want to see a seamless mosaic like this, so that we don’t lose information due overlapping pages, and as a single, clean layer, the mosaic becomes much easier to deal with.
Removing the edges is achieved by cropping or masking each layer, but creating these masks is typically very time-consuming and tedious work. OldInsuranceMaps.net uses a multimask to handle the task in a new way, and to understand why we’ll back up a couple of steps to how the overall workflow is put together (or you can just skip to the end of this post to see some nice animated GIFs I made last night).
Cropping vs. splitting & trimming
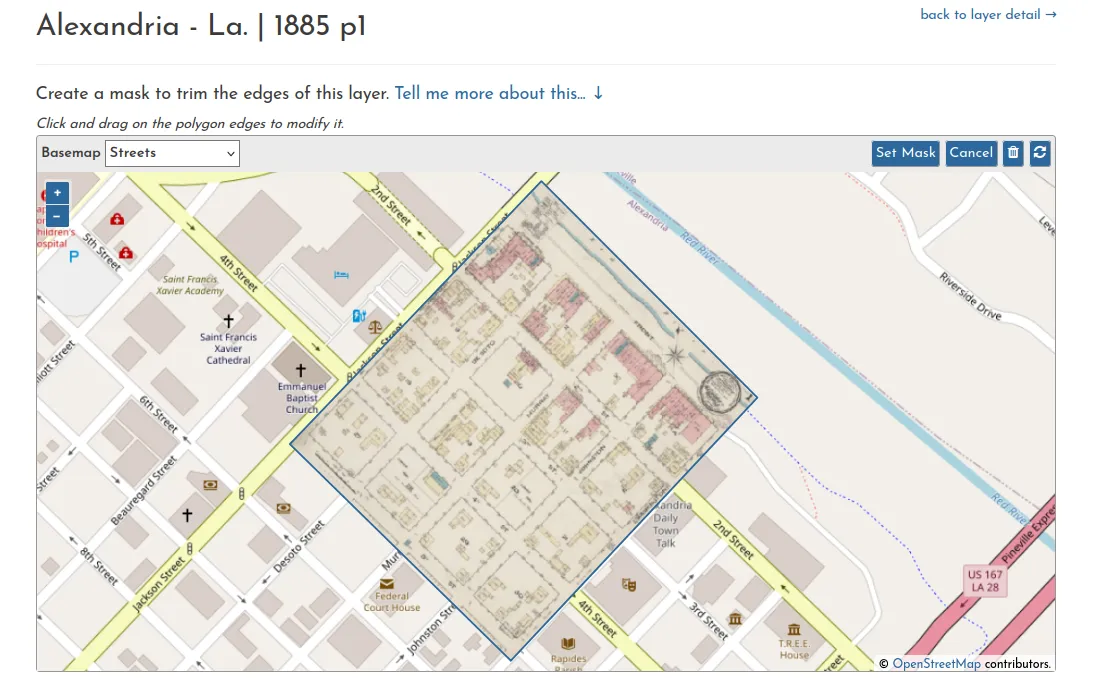
It’s common in georeferencing workflows to use a two-step process:
- Crop the image to remove unnecessary margins
- Georeference the cropped image
If you are working with a single standalone map, as opposed to a map that is a single page of a multi-page atlas, then this is a sufficient approach. Set the mask in the beginning, and you’ll very likely have no reason to modify it later.
However, with multi-page atlases, careful and fine adjustments to a mask may be needed after the page has been georeferenced, once you see how it lines up with an adjacent layer. Depending on the details of how the mask is implemented, this crop ➞ georeference workflow may not lend itself well to making iterative adjustments.
Another thing to consider is that it is fairly common to have multiple maps drawn on a single page, especially in these city-wide multi-page atlases. For example, Alexandria, La., 1892 is a Sanborn map with three sheets (shown below), each with a different number of distinct mapped areas: sheet one has four different regions, sheet two has two regions, and sheet three is one full-page map.
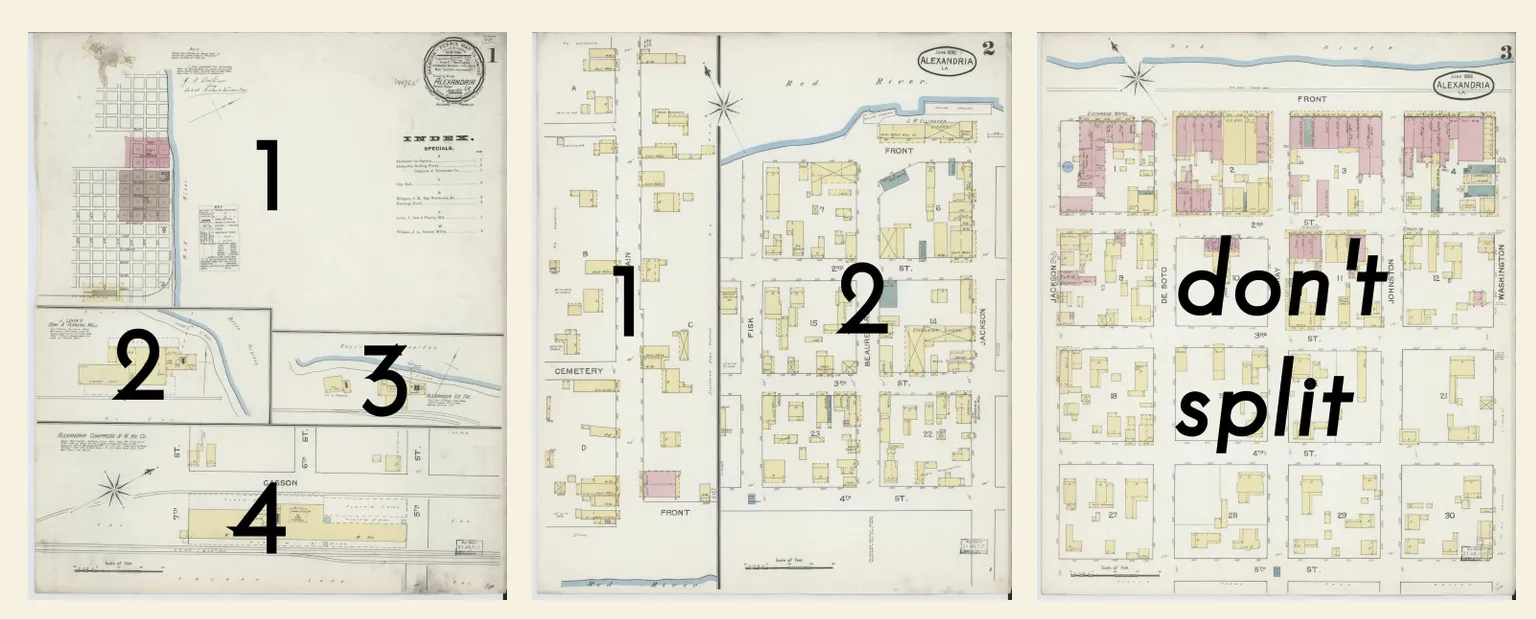
It would be nice to deal with these using a pair of digital scissors, cutting or splitting each page until each map region stands on its own. Then each one of these seven pieces can be georeferenced individually.
To recap then, we have 1) a need to handle multiple map regions within a given page, and 2) a need to carefully mask layers after they have been georeferenced, to properly accommodate the edges and masks of adjacent layers. These considerations led to the creation of a three-step workflow:
- Split a page: define the individual geographic regions
- Georeference each region: create and apply ground control points
- Trim the layer: remove margins of each georeferenced region as desired
Instead of crop ➞ georeference, where the first step both defines the region to georeference and determines the final mask, split ➞ georeference ➞ trim fully separates these concerns, as they are now handled on either side of the actual georeferencing operation. While technically adding a step, this granularity actually creates a simpler and more efficient workflow.
Trimming each layer by itself is slow
To facilitate this final trim step, OldInsuranceMaps.net originally implemented a “create a mask” interface that operated on a per-layer basis. Once an item had been georeferenced, you could add a mask (stored as GeoJSON), which allowed you to trim the margins from layers in a manner that was easy to modify and didn’t affect the existing georeferencing work.
However, it didn’t take long to realize that on a layer-by-layer basis this approach was cumbersome and practically unworkable. Even though it was easy to alter masks at any point because they were simply laid on top of the layers (and didn’t alter any files), doing so in an isolated environment provided no useful context for how to position one layer’s mask with regard to that of its neighbor.
Putting it all together: Multimask
Eventually it became clear that there must be a better way to handle this whole trimming thing, and the key came down to changing the conceptual level at which the task was approached (which, as I think about it, is a theme throughout a lot of the platform’s tooling). Instead of trimming each layer one at a time, let’s do them all at once!
In practice, this looks like putting all layers on the map at once (see the messy image at the top of this post) and then selecting a layer, drawing a mask, then selecting the next layer, drawing a mask, and so on. This is more efficient simply because there is no moving between web pages to move on to the next layer, but with the design features shown below, things really start to look different.
Snapping as a core value
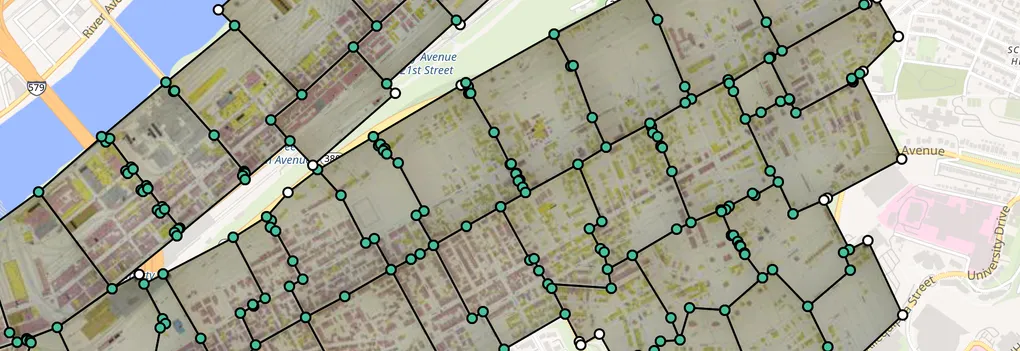
One of the main challenges with creating adjacent masks is making sure that they line up exactly with each other. OpenLayers, the web mapping library that OldInsuranceMaps.net uses throughout, has a very nice snapping capability, which is a key feature of the multimask interface.
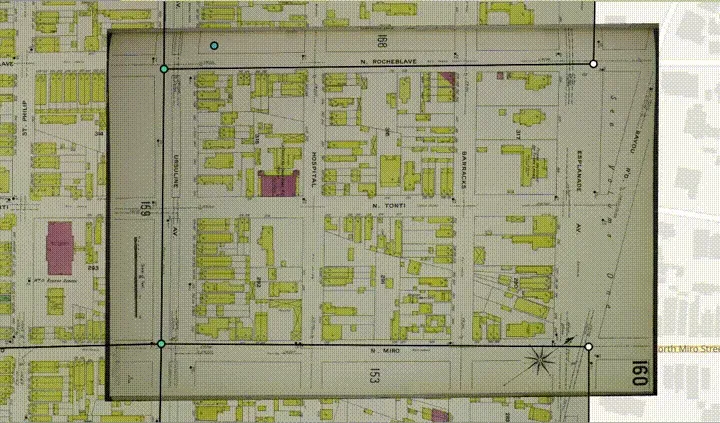
In the animation above, one sheet still needs to be masked, while all of its neighbors have already been handled. To create the mask for this final layer, you can just click, click, click, snapping to all adjacent vertices. Upon completion (double-click on the last point) a mask is created and applied to the layer immediately. This new mask shares exact vertices with all of its neighbors, guaranteeing seamless coverage and shared boundaries between layers.
Masks make a fabric
Many great things happen when you can use snapping. Not only is it easy to create masks quickly, but once multiple masks share the same vertex, any alterations to that vertex affect each mask.
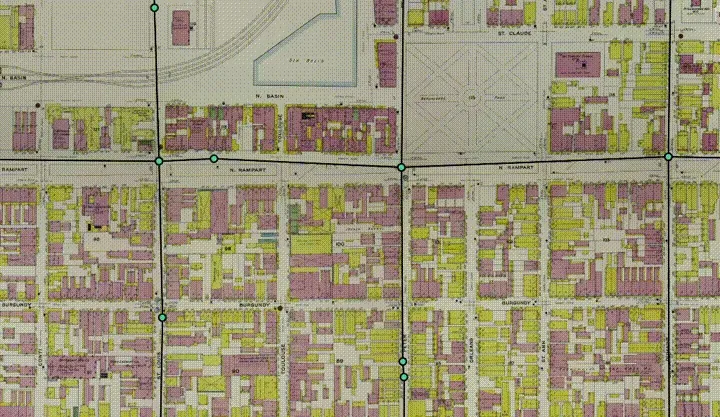
For example, if four masks share a corner, moving that corner vertex will change all of them at once.
What is that street name?
Fine-tuning the boundaries between different sheets is necessary when there are certain details at the edge of one layer that should be masked around to ensure that important information isn’t lost. Making small adjustments like this is very easy because adding a vertex to a shared boundary automatically applies it to both masks.
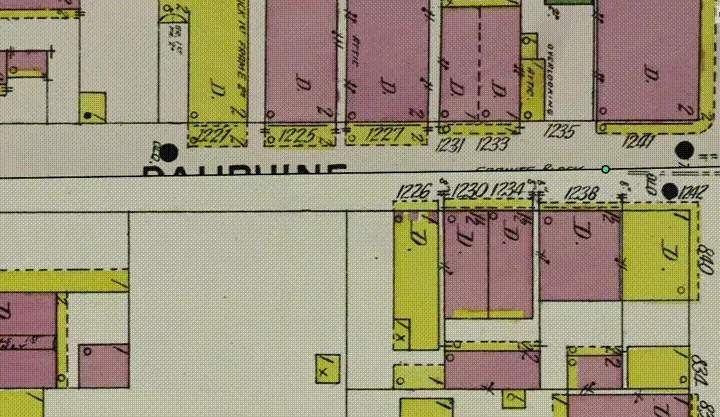
In some cases, two neighboring sheets may have the name of the same street in very close proximity to each after they have been georeferenced, so you’ll want to reveal that street name from on layer and hide it from the other.
Using colors for quality control
Until recently, all vertices were white within the multimask interface, but a couple months ago I added something I had had in mind for a while: color-coding. If a vertex stands on its own, it is white, but if it has been snapped to another vertex it is green. This is especially helpful for cleaning up internal vertices that should be snapped together but for some reason haven’t been.
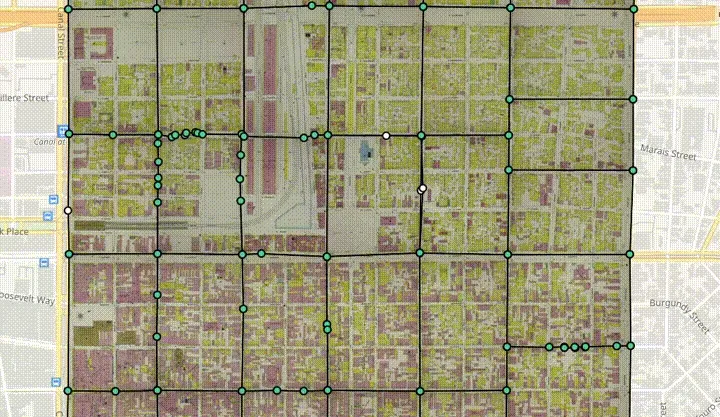
There are plenty of cases in which a vertex will legitimately stand on its own, like an exterior corner, or even internally where edges of sheets don’t actually overlap. But having this new visual cue makes comprehensive cleanup efforts much easier to do.
Some final thoughts
- There is still some clunkiness with how the whole interface works, and capabilities I hope to add in the coming year. So stay tuned!
- A foundational characteristic of the OldInsuranceMaps.net data model is layersets, not covered here at all, which are thematic categories of cartographic content within a given atlas and the context within which a multimask is created and applied. A topic for a future post…
- Creating masks is not only about trimming margins–masks are also precise vector features that define the coverage area of every single layer. These boundaries can by used in many different ways, for example this interactive mosaic demo I made many years ago.
- Many thanks as always to the developers behind OpenLayers and this set of extensions, the Crop filter from which makes this whole idea possible.